 MC Arts


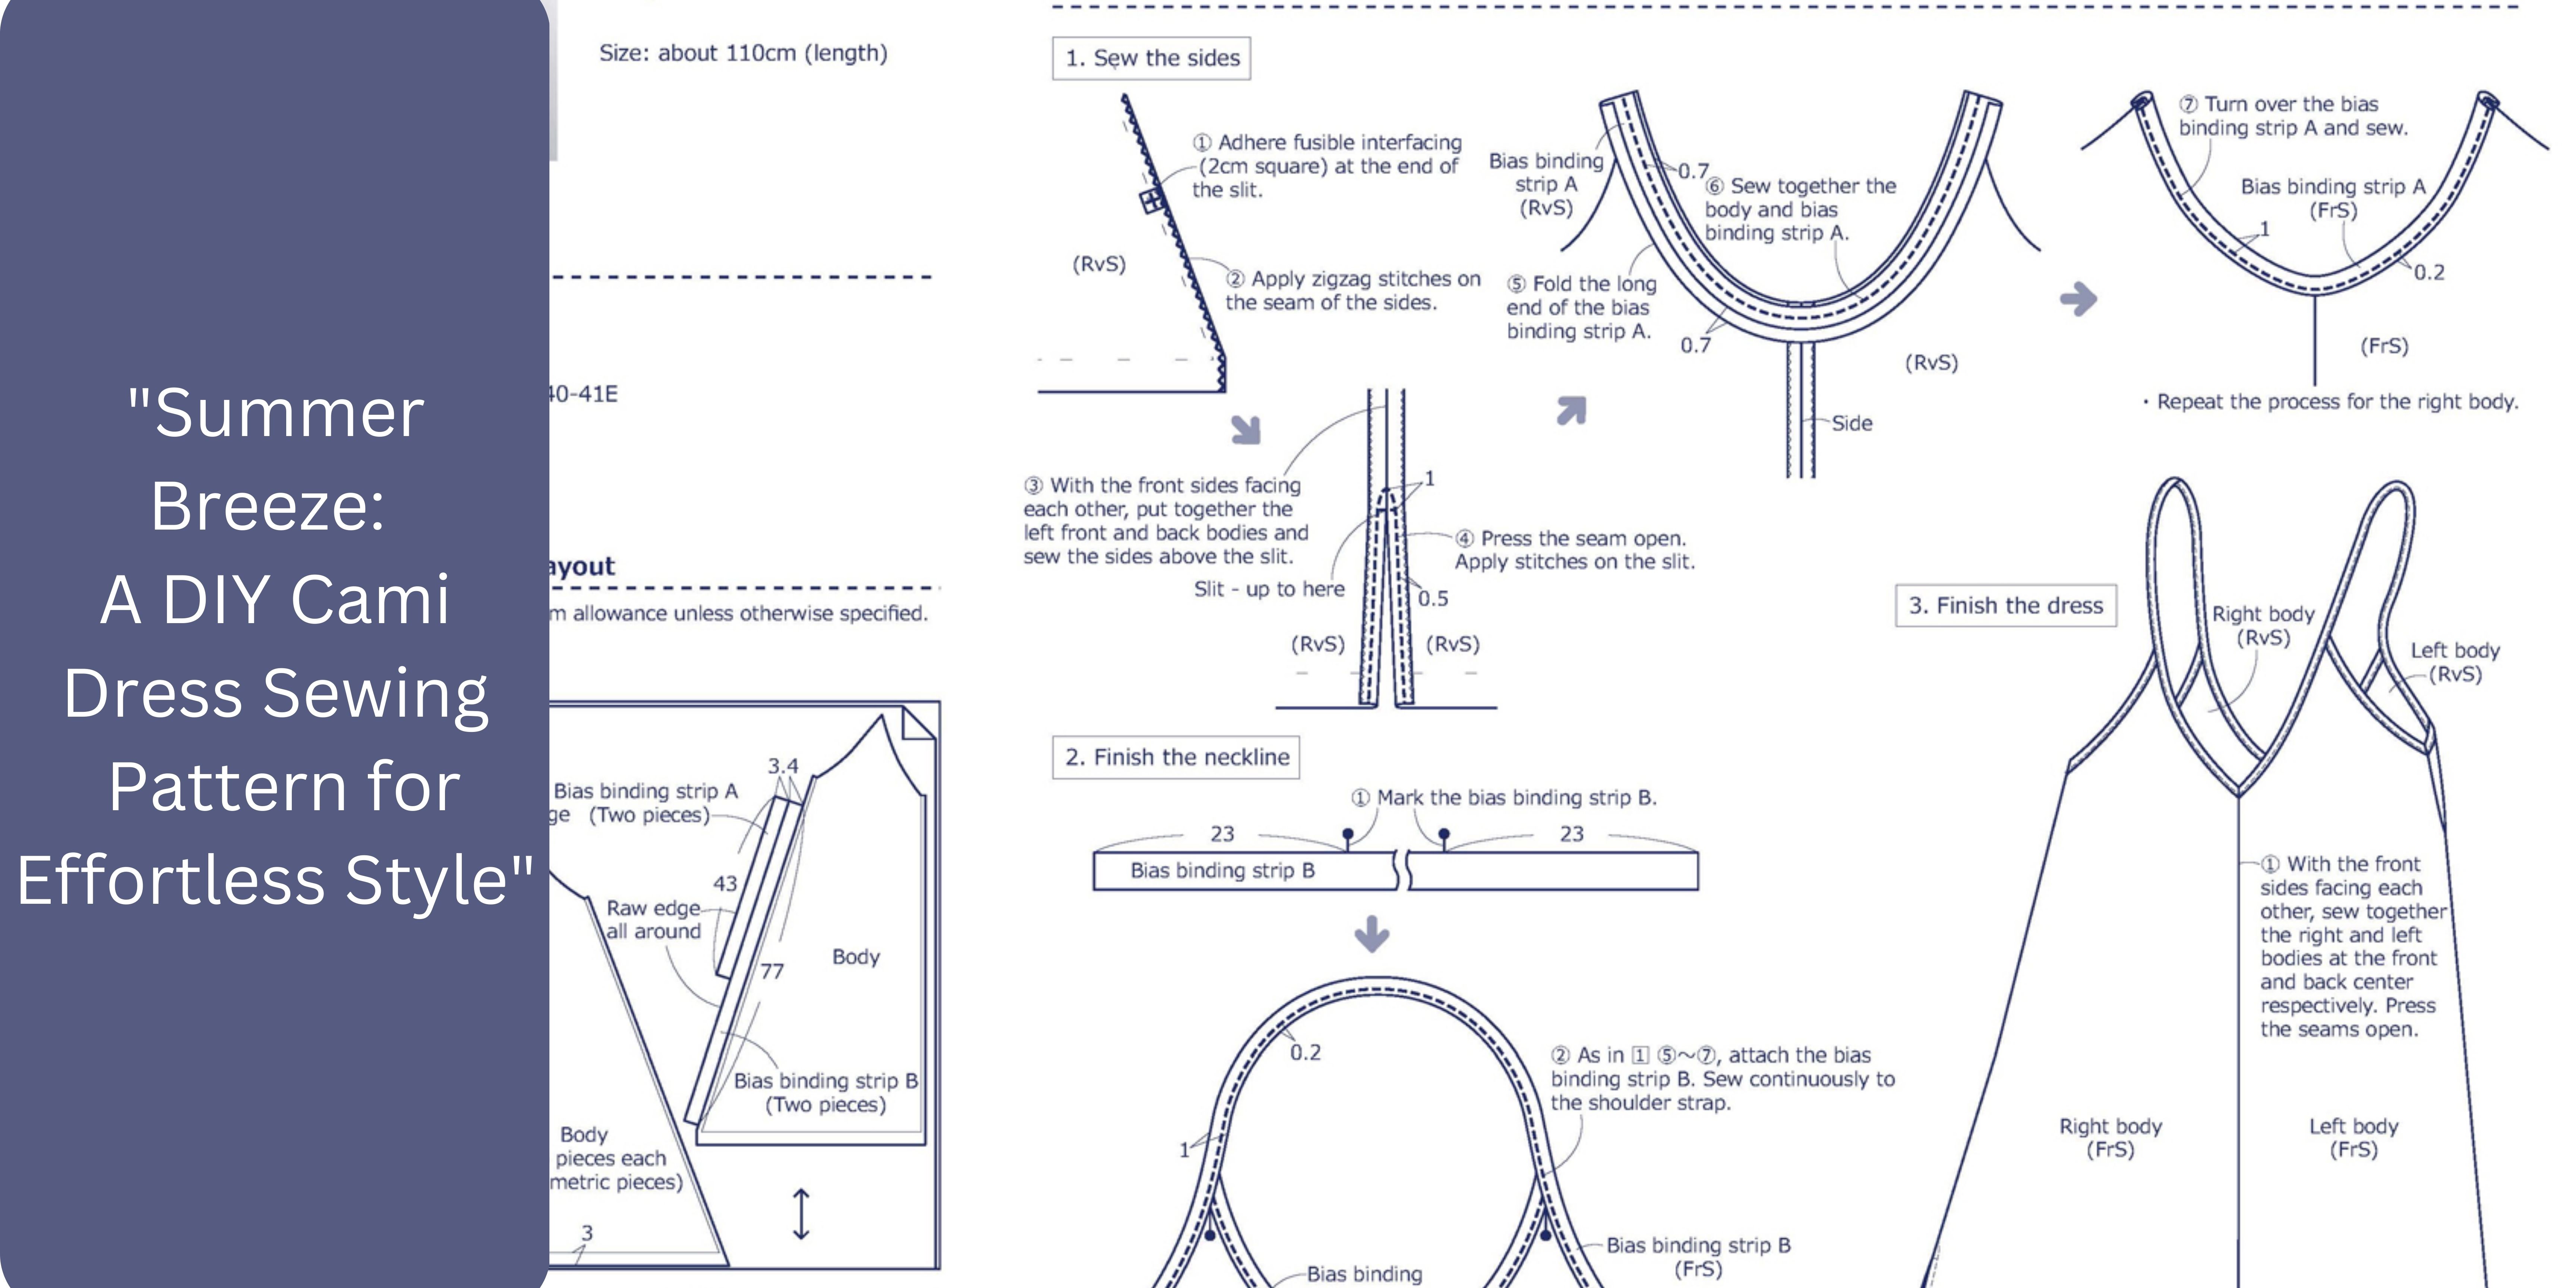
.jpg)
Bermuda Shorts Sewing Pattern Creation Methods
Bermuda Shorts Sewing Pattern Creation Methods
Welcome to our detailed guide on creating your very own Bermuda shorts! Bermuda shorts are a versatile and stylish addition to any wardrobe, perfect for warm weather or casual outings. This step-by-step guide will take you through the process of sewing your own pair using a downloadable pattern.
Materials Needed:
- Bermuda Shorts Sewing Pattern (PDF format)
- Fabric (Suggestions: Cotton, Linen, Denim)
- Scissors
- Pins
- Sewing machine
- Measuring tape
- Iron
- Elastic
Step 1: Choose Your Fabric
Start by selecting the fabric that best suits your style and the occasion. Cotton and linen are excellent choices for lightweight, breathable shorts, while denim offers a more structured, durable option. You can also experiment with printed or patterned fabrics for a unique look.
Step 2: Print and Cut the Pattern
Download and print your Bermuda shorts sewing pattern. Ensure that your printer settings are accurate to maintain the correct scale. Once printed, carefully cut out each pattern piece according to the cutting guide provided.

Step 3: Pin and Cut the Fabric
Lay out your fabric on a flat surface and pin the pattern pieces securely onto it. Make sure to align the pattern with the grain of the fabric as indicated. Cut out the fabric pieces, remembering to include seam allowances as specified in the pattern.
Step 4: Sew the Front and Back Pieces Together
With the right sides of the fabric facing each other, pin and sew the front and back pieces together along the inseam. Afterward, sew the crotch seam, ensuring a smooth and even finish.
Step 5: Sew the Side Seams
Align the side seams of the front and back pieces, pin them in place, and sew from the hem up to the waistband. This will start to give your shorts their shape.
Step 6: Create the Waistband
Take the waistband piece, fold it in half with the right sides together, and sew the short ends to form a loop. Next, fold the waistband in half lengthwise with the wrong sides together and press it flat.

Step 7: Attach the Waistband to the Shorts
Pin the waistband to the top edge of the shorts, right sides together, aligning the seam of the waistband with the back seam of the shorts. Sew the waistband to the shorts, leaving a small gap to insert the elastic.
Step 8: Insert the Elastic
Measure a piece of elastic that comfortably fits your waist. Using a safety pin or bodkin, thread the elastic through the waistband casing. Once through, sew the ends of the elastic together securely and stitch the opening in the waistband closed.
Step 9: Hem the Shorts
Finish your Bermuda shorts by folding the bottom edges up to create a hem. Pin the hem in place and sew using a straight stitch. Press the hems with an iron for a crisp finish.

Conclusion
Congratulations on completing your Bermuda shorts! This project is a fantastic way to customize your wardrobe and practice your sewing skills. Whether you chose a classic solid fabric or a vibrant print, your handmade shorts are sure to be a stylish and comfortable addition to your closet. Enjoy your new creation and happy sewing!
Comments (0)


Sign Up to Our Newsletter

Secure Payment


Follow Us


The Copyright @ 2026 epatternz.com All rights reserved.


